Albion Radar Menu Overview
Explore the Albion Radar menu and learn how to customize player tracking, resources, mobs, bosses, chests, Mists, dungeons, ignore list, overlay position, opacity, and ra...
Albion Radar Menu: Full Control Over Your Overlay Settings
Albion Radar is designed to give players a clear and customizable overlay experience for Albion Online. Instead of forcing every user into one fixed layout, the menu allows you to control what information appears on your radar, how it is displayed, and which alerts matter the most during gameplay.
In this article, we will go through the main Albion Radar menu sections and explain what each feature does.
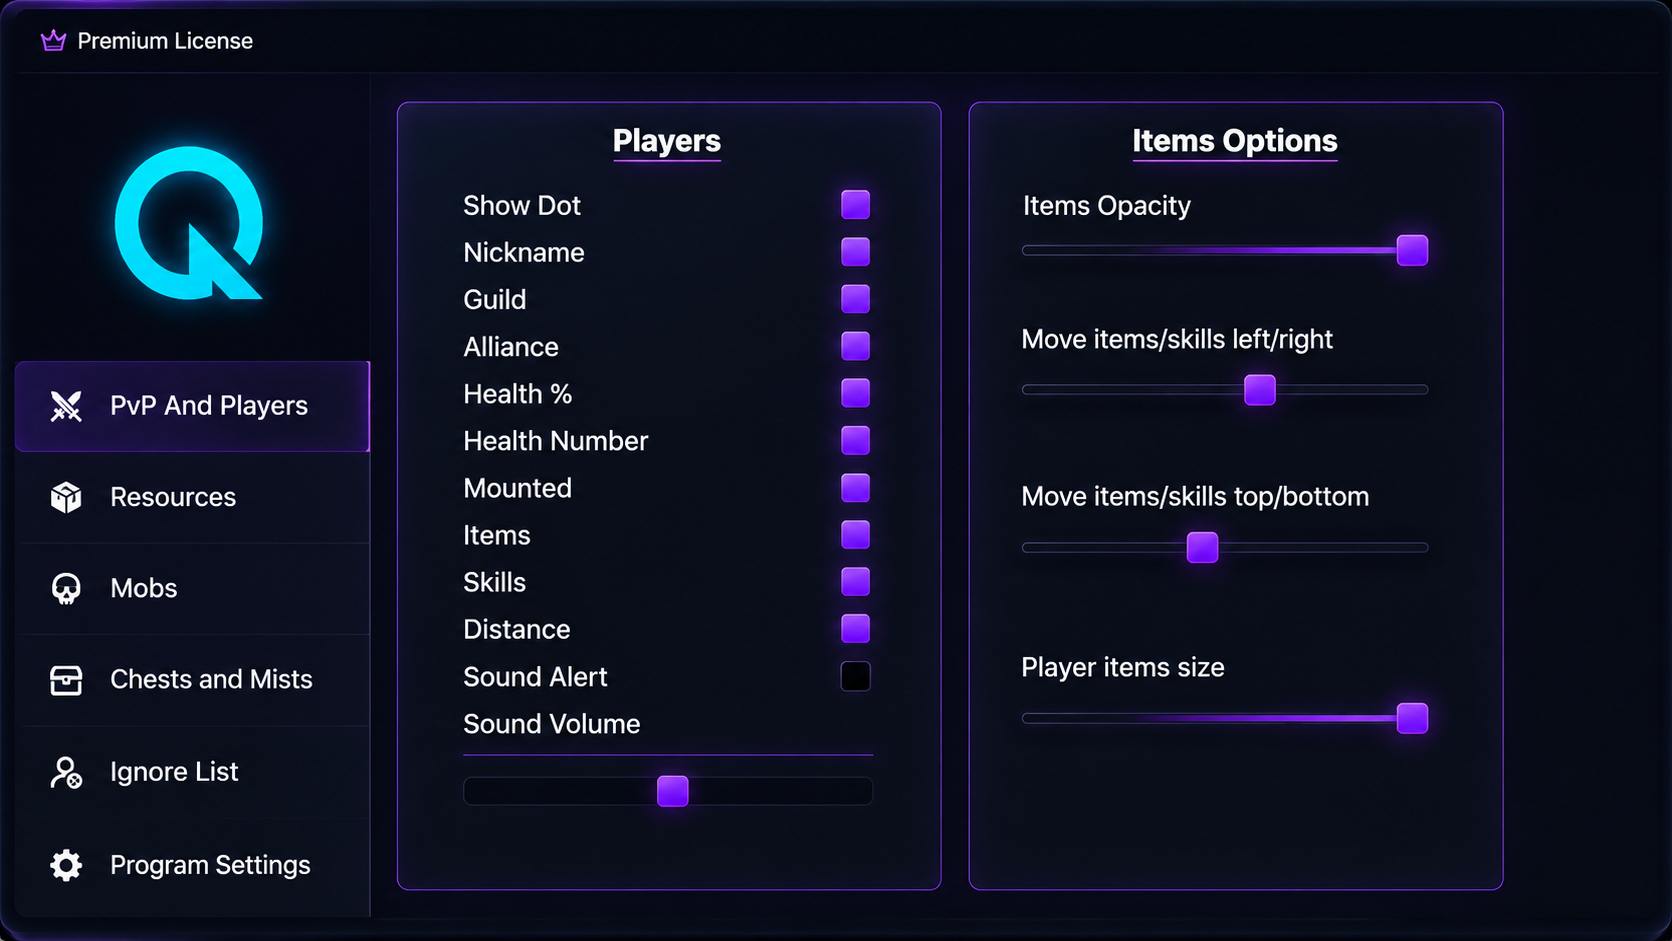
PvP and Players Settings
The PvP and Players section gives you control over player-related information shown on the radar overlay. This is one of the most important parts of Albion Radar because it helps you decide how much information you want to see about nearby players.
You can enable or disable details such as:
- player dot visibility,
- nickname,
- guild,
- alliance,
- health percentage,
- health number,
- mounted status,
- carried items,
- equipped skills,
- distance,
- sound alerts.
This makes the player overlay highly flexible. For example, if you only want a clean radar with nearby player dots, you can keep the interface minimal. If you prefer more detailed PvP information, you can enable nicknames, guilds, alliances, health values, items, skills, and distance indicators.
The menu also includes sound alert options. This allows Albion Radar to notify you when a new player appears nearby. You can enable or disable the sound alert and adjust the sound volume depending on your preference.
Player Items and Skills Display
Albion Radar also includes dedicated options for item and skill display. These settings allow you to control how player equipment and skills are shown on the overlay.
You can adjust:
- items opacity,
- item and skill position left or right,
- item and skill position top or bottom,
- player item size.
This is useful if you want to match the overlay position with your own screen layout. Some users prefer items and skills to appear close to the radar, while others prefer them moved away from the center of the screen for better visibility.
The opacity setting is especially helpful because it lets you decide whether item information should be strong and visible or more subtle in the background.
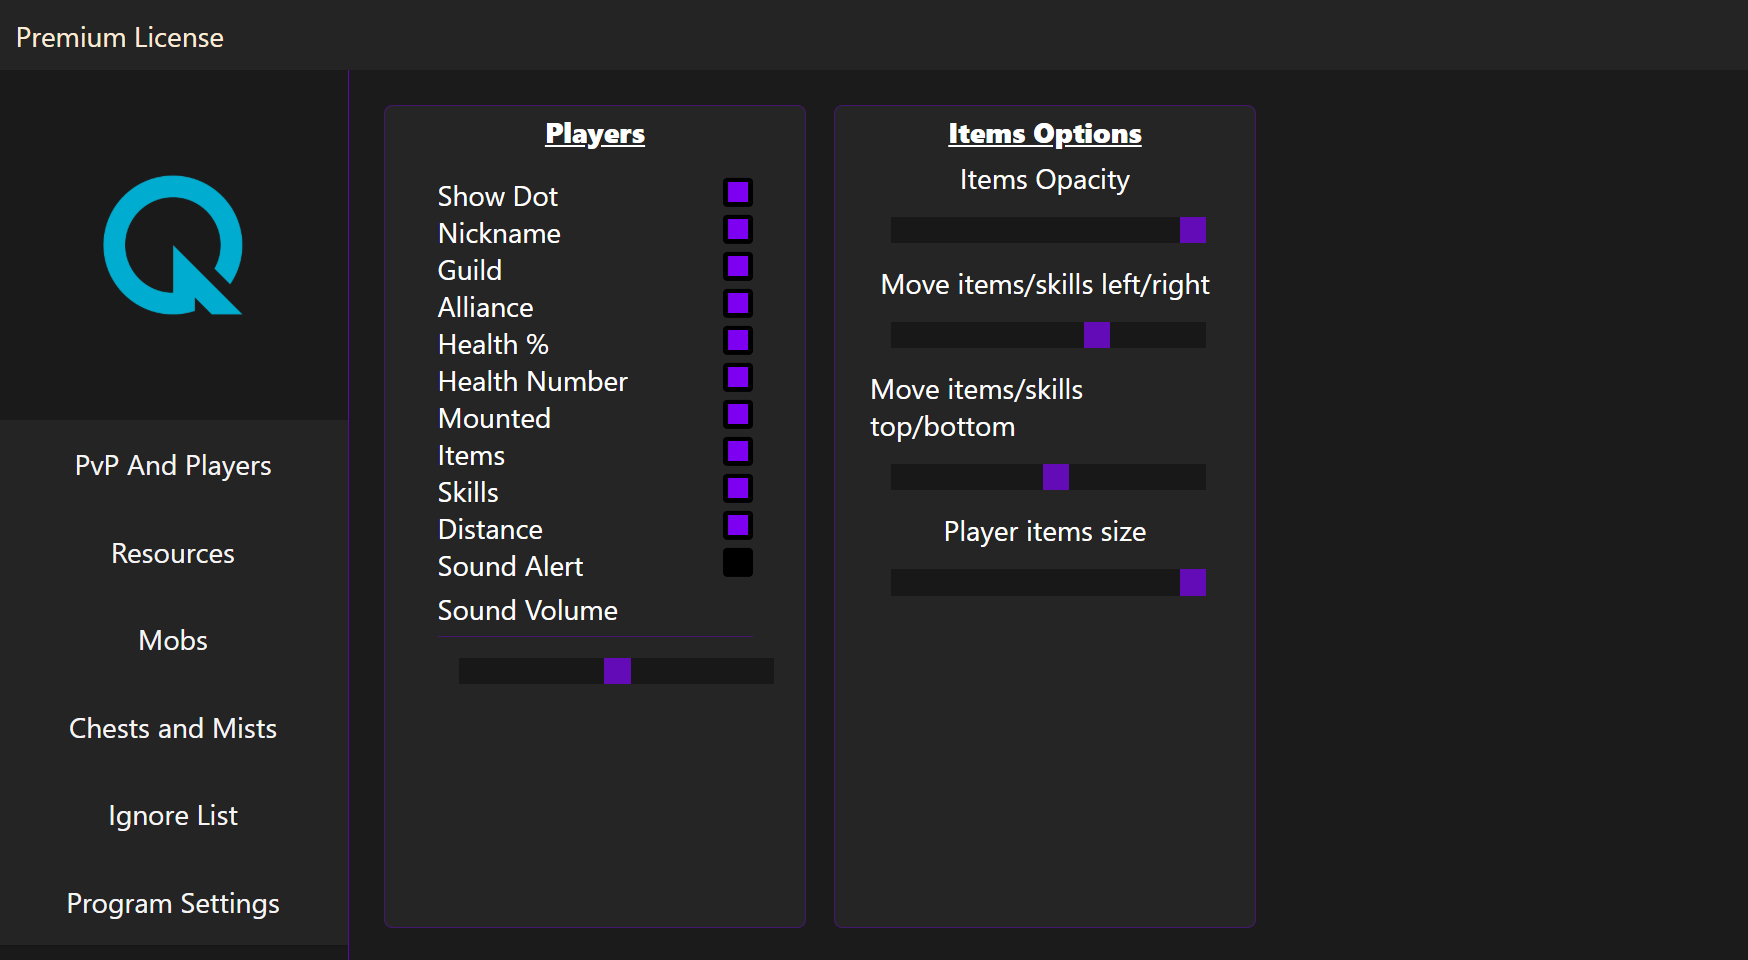
Resources Settings
The Resources section is made for players who want better control over harvesting-related information. Albion Radar allows you to filter resources by tier, enchant level, and type.
You can select resource tiers from:
- T1,
- T2,
- T3,
- T4,
- T5,
- T6,
- T7,
- T8.
You can also control enchant visibility:
- E0,
- E1,
- E2,
- E3.
Resource type filters include:
- fiber,
- wood,
- ore,
- rock,
- hide.
This gives you full control over which resources appear on your radar. For example, if you are only interested in higher-tier resources, you can disable lower tiers and keep your overlay cleaner. If you are searching for a specific resource type, you can focus only on that category.
The resource icon size slider allows you to adjust how large resource markers appear on your screen.
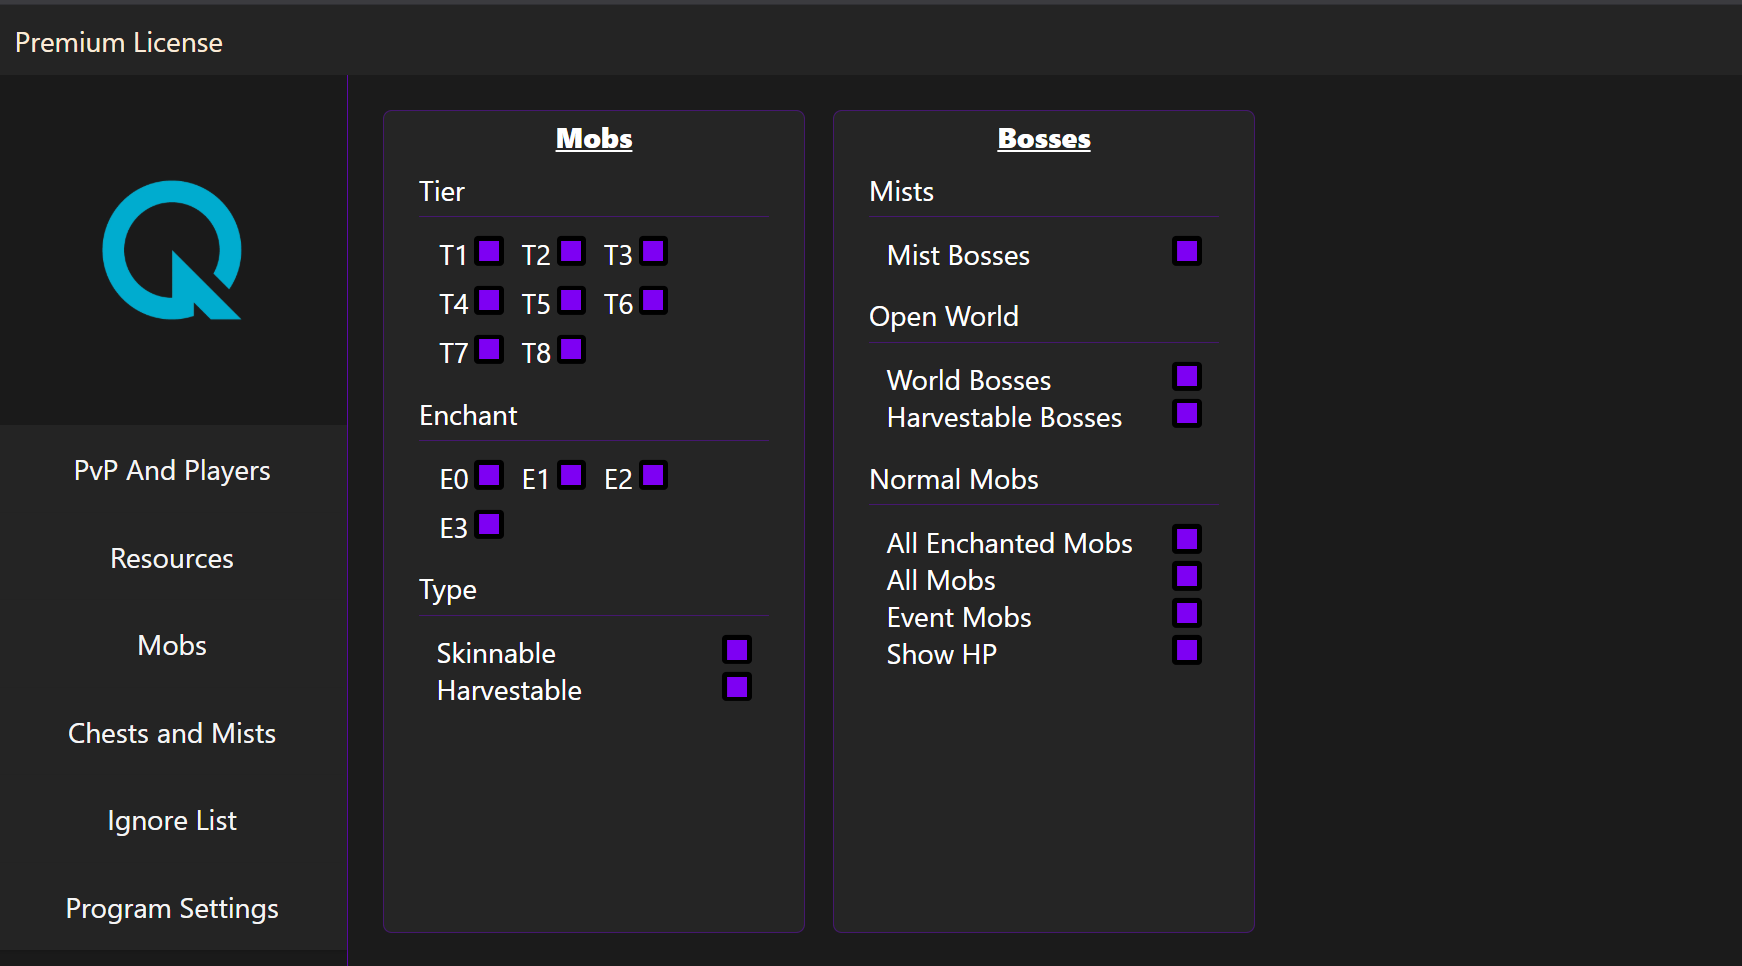
Mobs and Bosses Settings
The Mobs section lets you filter creatures by tier, enchant level, and type. You can choose which mob tiers should appear on the radar, from T1 up to T8, and also select enchant levels from E0 to E3.
Albion Radar also allows you to filter mobs by type:
- skinnable mobs,
- harvestable mobs.
This helps you focus only on the mobs that are relevant to your current activity.
The Bosses panel adds more advanced options for special enemies and boss-related content. You can enable or disable:
- Mist Bosses,
- World Bosses,
- Harvestable Bosses,
- All Enchanted Mobs,
- All Mobs,
- Event Mobs,
- Show HP.
The HP option is useful when you want to see health information for mobs directly through the radar interface. This can make it easier to track important targets without relying only on visual information from the game screen.
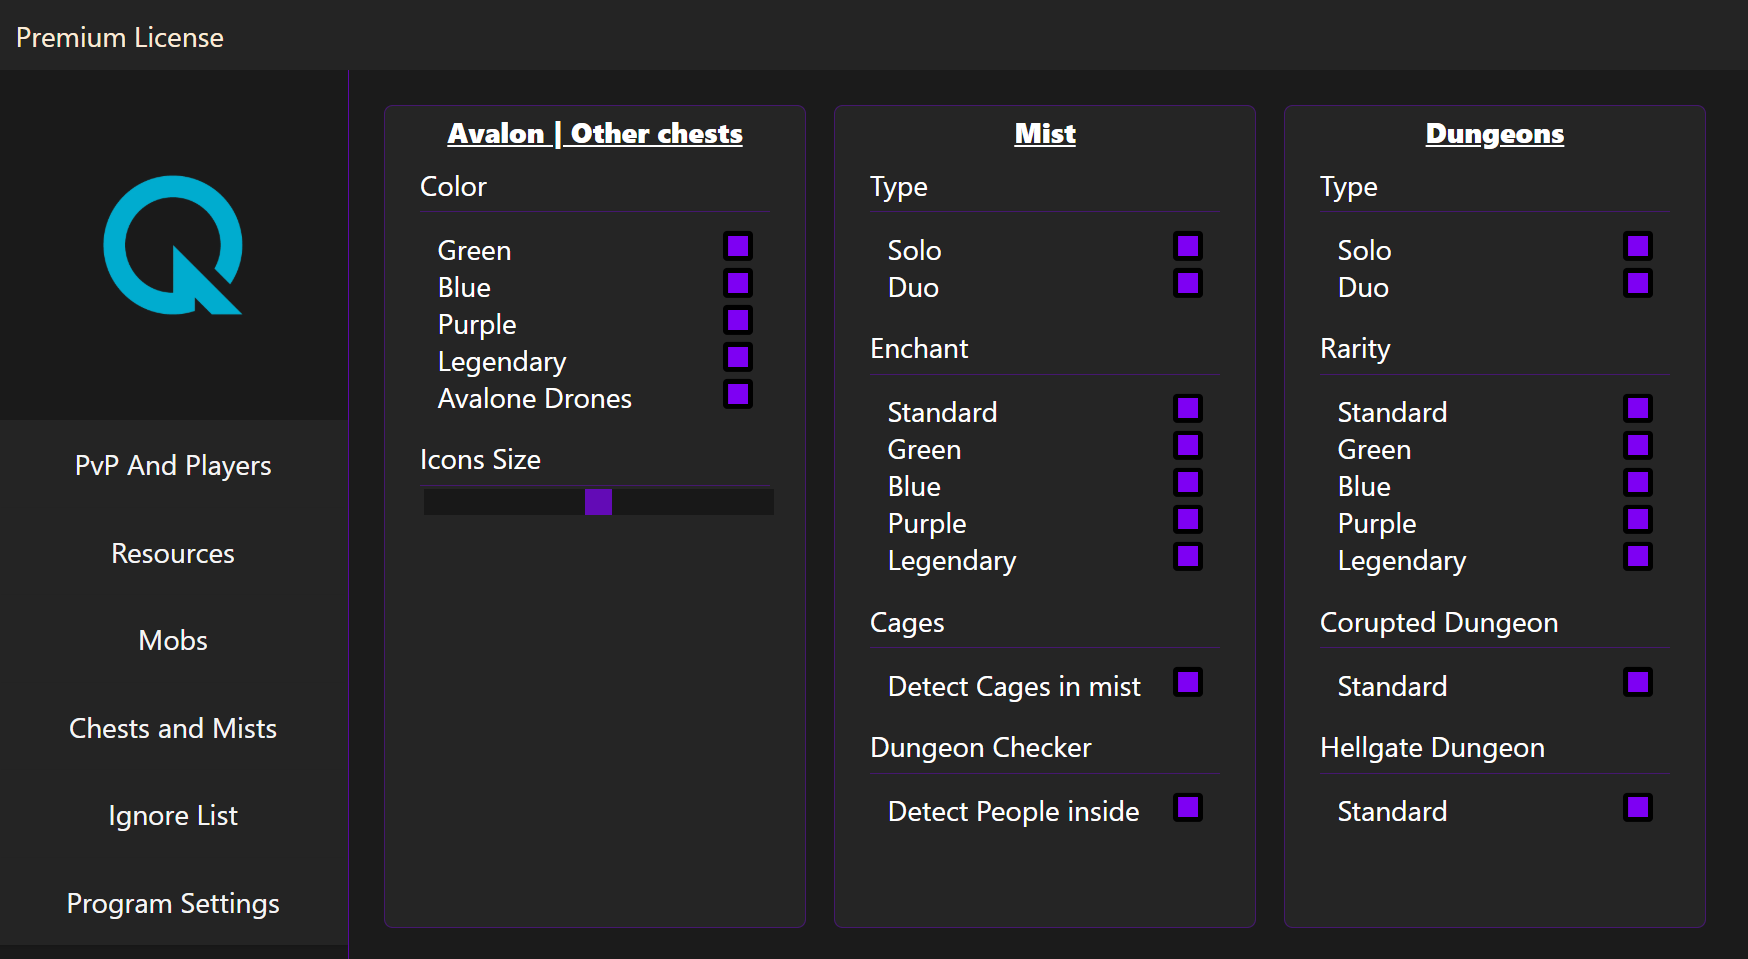
Chests, Mists, and Dungeons
The Chests and Mists section gives you several filters for chest-related and dungeon-related content.
For Avalon and other chests, you can filter by color:
- green,
- blue,
- purple,
- legendary.
You can also enable Avalon Drones and adjust chest icon size. This allows you to decide how visible chest markers should be on the radar.
The Mist section includes options for:
- solo Mists,
- duo Mists,
- standard,
- green,
- blue,
- purple,
- legendary,
- cages,
- detect cages in Mist,
- dungeon checker,
- detect people inside.
These options are useful for players who want more control over Mist-related information. You can decide which Mist types and rarities should appear and whether additional objects like cages should be detected.
The Dungeons section includes filters for:
- solo dungeons,
- duo dungeons,
- standard,
- green,
- blue,
- purple,
- legendary,
- corrupted dungeon,
- hellgate dungeon.
This helps you keep the overlay focused on the dungeon content that matters to you.
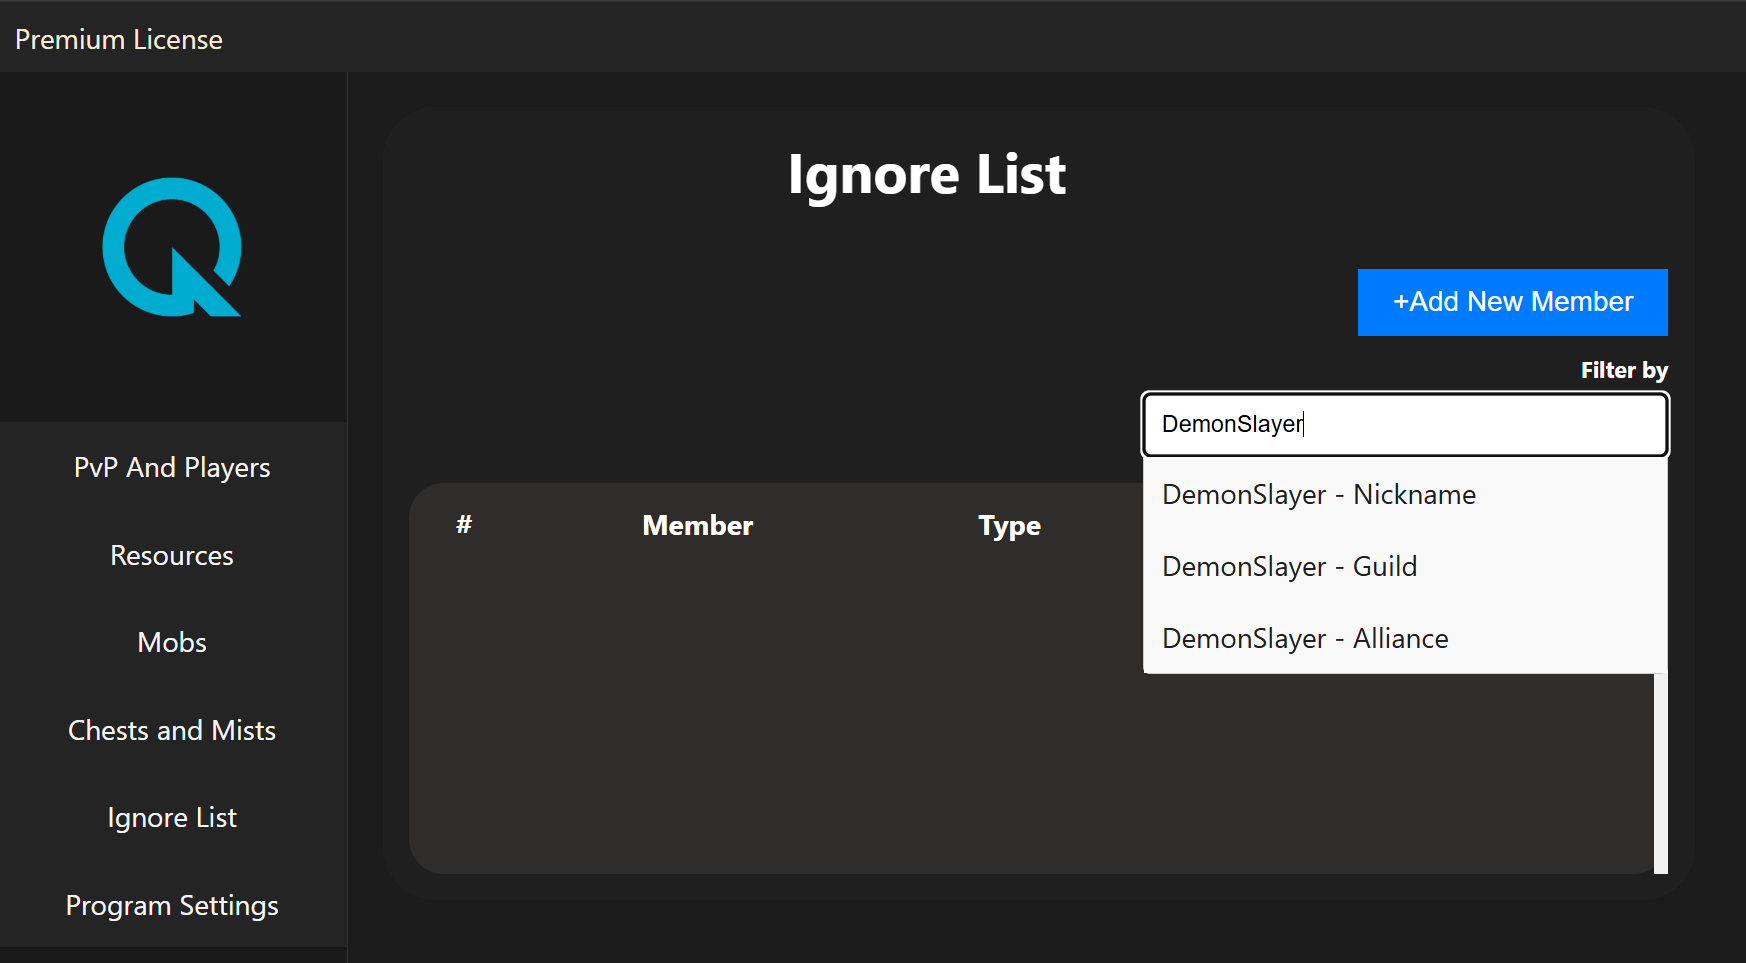
Ignore List
The Ignore List feature allows you to manage players, guilds, or alliances that you do not want to track in the same way as others.
You can add a new member and filter entries by:
- nickname,
- guild,
- alliance.
This is useful when you want to avoid repeated alerts or visual clutter from known players, friendly guilds, or specific alliances. Instead of showing every detected entity with the same priority, Albion Radar gives you a way to organize and reduce unnecessary information.
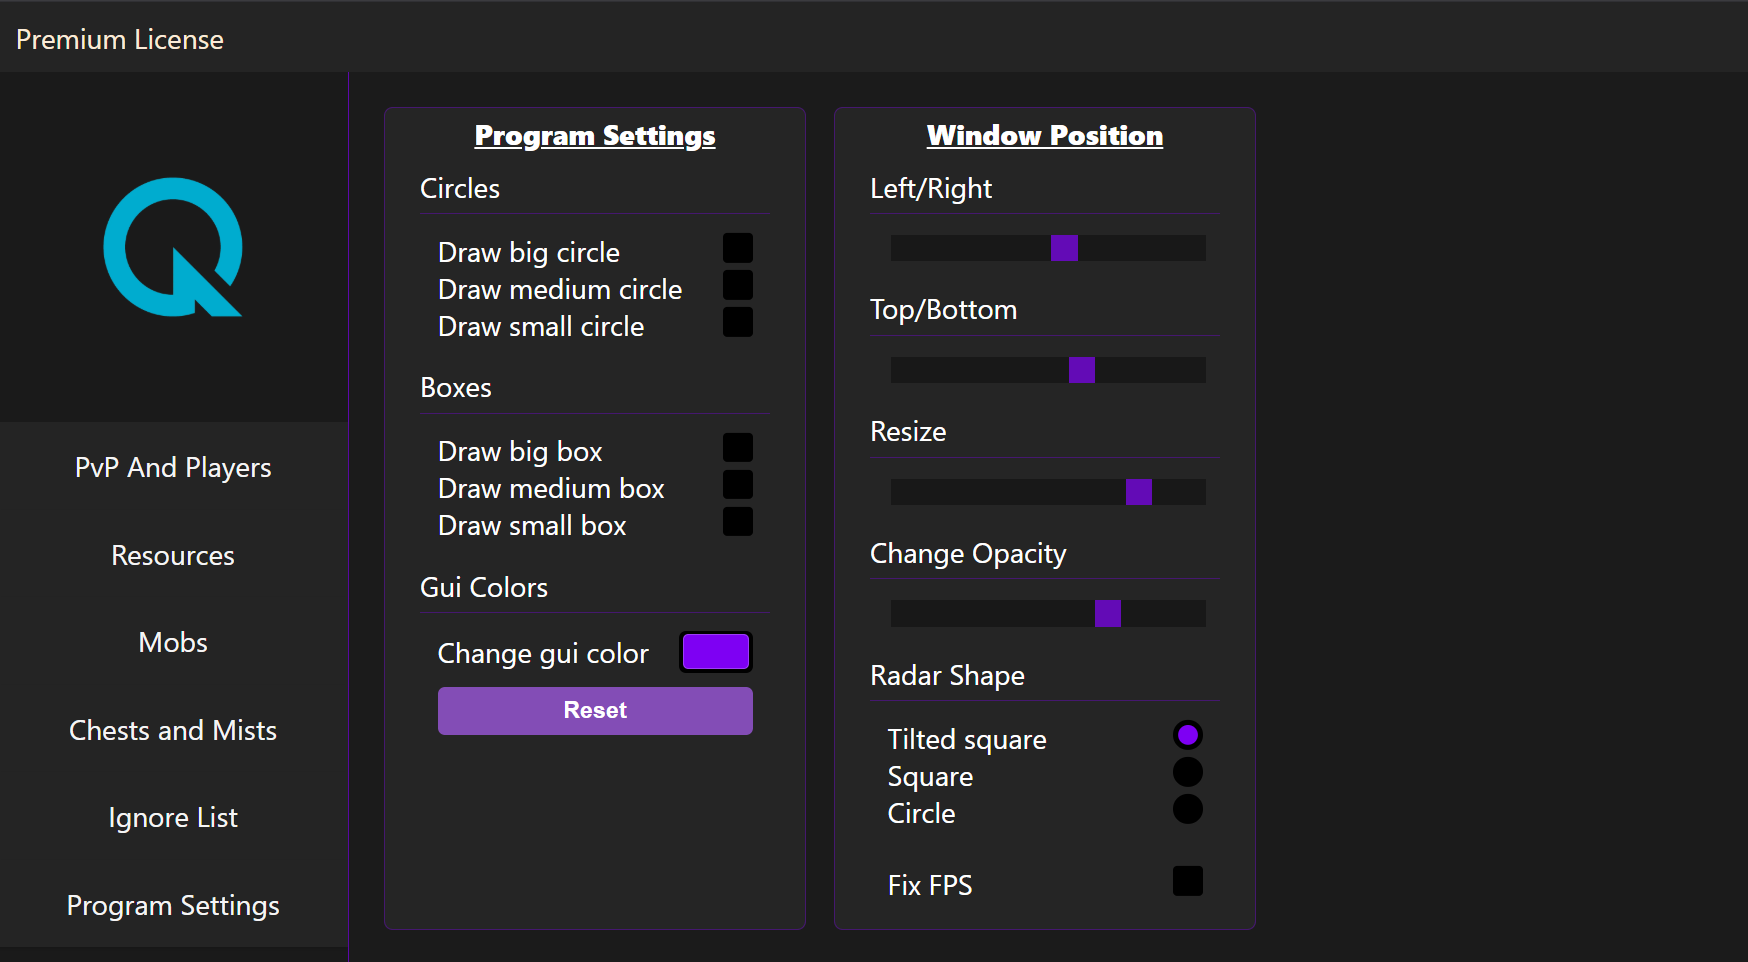
Program Settings
The Program Settings section controls the visual style and positioning of the radar overlay.
You can enable or disable drawing options such as:
- big circle,
- medium circle,
- small circle,
- big box,
- medium box,
- small box.
These settings allow you to customize how detection areas or visual ranges are shown on your screen.
Albion Radar also includes GUI color customization. You can change the interface color and reset it if needed. This makes it easier to match the radar with your preferred visual style.
Window Position and Radar Shape
The Window Position settings allow you to adjust where the radar appears on your screen.
You can control:
- left and right position,
- top and bottom position,
- resize,
- opacity.
This is important because every player uses a different screen resolution, UI scale, and game layout. With these options, you can place the Albion Radar overlay exactly where it feels comfortable.
The radar shape options include:
- tilted square,
- square,
- circle.
You can also enable the Fix FPS option, which is designed to improve the smoothness and stability of the overlay display.
Why Customization Matters
A good radar overlay should not overload the screen with unnecessary information. Albion Radar gives users control over what is displayed, how it looks, and where it appears.
Whether you care mostly about nearby players, resources, mobs, bosses, chests, Mists, or dungeons, the menu allows you to adjust the overlay to match your playstyle.
The goal is simple: keep the radar clean, readable, and useful.
Final Thoughts
Albion Radar includes a wide range of customization options for PvP tracking, resource detection, mob filters, boss alerts, chest visibility, Mist settings, dungeon filters, ignore lists, and overlay appearance.
With detailed menu controls, users can create a radar layout that fits their screen, gameplay style, and personal preferences. From player information and sound alerts to resource tiers, dungeon types, radar shapes, and opacity settings, Albion Radar gives you the tools to build a cleaner and more practical Albion Online overlay experience.